

Quick Healthy Meal Prep Tips for Busy Cooks
Table of Contents
- Why Quick Healthy Meal Prep Tips Beat Takeout
- The 3-3-3 Rule: A Simple Framework for Meal Prep Tips
- Your 30-Minute Meal Solutions Game Plan
- Meal Prep Container Essentials: What You Actually Need
- Low Sodium Meal Prep Ideas That Skip the Bland
- Batch Cooking Proteins and Whole Grains on Prep Day
- Food Safety Storage Guidelines for Weekly Prep
- Your First Meal Prep Session: A Step-by-Step Plan
- Frequently Asked Questions
Last Updated: September 4, 2026
Quick healthy meal prep tips are the difference between home-cooked dinners and sad takeout containers. The most effective tips focus on a simple, repeatable system rather than spending your entire Sunday in the kitchen. At Twisted Pepper Co., we help busy home cooks turn fresh ingredients into fast, flavorful meals, and this guide is built around the same 30-minute meal solutions we recommend to our own customers.
Meal prep fails when it becomes a chore. Most guides overcomplicate the process with elaborate recipes and rigid schedules. Below, we'll show you how to structure a prep session that takes about an hour, saves you time all week, and keeps your meals interesting, covering a planning framework, the containers you need, and food safety rules.
Why Quick Healthy Meal Prep Tips Beat Takeout
Meal prep is a time-management strategy that puts you back in control of your week. With pre-cooked proteins, washed vegetables, and ready-to-assemble components in the fridge, the decision fatigue that leads to takeout disappears. You are not choosing between cooking and ordering; you are choosing between reheating and assembling.
The financial and nutritional benefits compound quickly. Prepping at home naturally supports portion control, and you decide exactly what goes into every dish, which is especially valuable if you are managing sodium intake.
The 3-3-3 Rule: A Simple Framework for Meal Prep Tips
The 3-3-3 Rule balances variety with efficiency. It breaks your week into three proteins, three grains or starches, and three vegetable sides. Cook these in bulk, then mix and match them throughout the week to create different meals without cooking from scratch each night.
This framework prevents the two biggest failure points: boredom and burnout. With three of each component, you can assemble a different meal every night. It also simplifies your grocery list, since you are buying larger quantities of fewer items, reducing both cost and and food waste.
Your 30-Minute Meal Solutions Game Plan
A successful prep session follows a clear sequence to minimize active cooking time, with the goal of having a full week of components ready in roughly one hour of focused work.
- Write your menu around the 3-3-3 Rule. Pick three proteins, three grains, and three vegetable sides.
- Create one grocery list organized by store aisle to avoid backtracking.
- Prep your ingredients first. Wash and chop all vegetables before you turn on any heat.
- Cook your proteins while grains simmer on another burner.
- Cool everything completely before packing to prevent condensation and bacterial growth.
- Assemble and label containers with the contents and date.
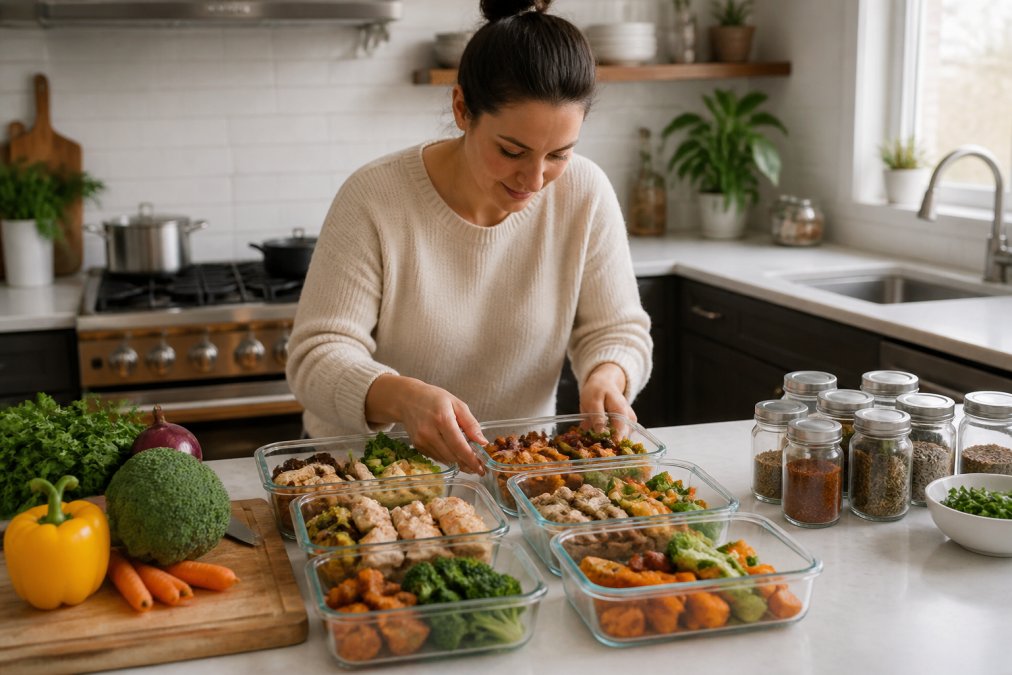
This game plan is the core of 30-minute meal solutions: a prep day that respects your time. Dedicating one hour on a Sunday afternoon saves many home cooks over five hours of cooking and cleanup during the week. The key is to use cooking methods that require little babysitting, such as oven roasting, batch cooking in an instant pot, or simmering soups on the stove.
Meal Prep Container Essentials: What You Actually Need
Meal prep container essentials are simpler than the internet suggests, but the material science behind them matters more than most guides admit. You need three types: large airtight containers for bulk grains and proteins, individual portion containers for grab-and-go meals, and small jars for dressings and sauces. The real depth is in choosing materials that actively extend freshness, not just store food.
Glass vs. Plastic: The Trade-Offs
Glass containers are the best investment for most home cooks. They don't stain from tomato-based dishes, reheat safely, and last for years. Borosilicate glass handles thermal shock better than soda-lime glass, so you can move it from freezer to oven without cracking. Look for snap-lock lids that create a reliable seal. For portion control, a set in two sizes, roughly 2-cup and 3-cup capacities, covers most needs.
High-quality plastic containers, particularly those made from polypropylene (PP, recycling code 5), are lighter and less fragile for commutes. Avoid polycarbonate (code 7) for hot foods, as it can contain BPA. If you choose plastic, accept that it will absorb odors and oils over time; replacing them every 12-18 months is common among serious meal preppers.
Beyond Tupperware: Advanced Storage Technology
Top-tier meal prep systems use two technologies that dramatically extend freshness:
-
Vacuum Sealing: Removing air is the single most effective way to slow oxidation and bacterial growth. A dedicated vacuum sealer is ideal for freezing proteins, soups, and cooked grains. Vacuum-sealed cooked chicken can maintain quality in the freezer for 6-12 months, versus 2-3 months in standard freezer bags (fsis.usda.gov). For sous-vide enthusiasts, vacuum sealing is already part of the workflow.
-
Blast Chilling: The USDA recommends cooling cooked food from 140°F to 70°F within two hours, and then to 40°F within four more hours (the FDA). Home refrigerators struggle to do this quickly for large batches. A countertop blast chiller forces cold air over food, dropping temperature in minutes rather than hours. This is a premium investment, but it's the difference between food that lasts 3 days and food that lasts 5-7 days in the fridge, because it minimizes the time food spends in the bacterial "danger zone" (40°F-140°F).
The Mason Jar System for Sauces and Dressings
For dressings and sauces, 4-ounce or 8-ounce mason jars with plastic storage lids (not the two-piece canning lids) are superior to any commercial container. They are leak-proof, dishwasher-safe, and stack efficiently. Batch-make a vinaigrette or yogurt-based sauce on Sunday and portion it into jars; these hold quality for 5-7 days, whereas store-bought dressing bottles often degrade faster once opened.
The 2-Day Rule for Chopped Vegetables
Even with perfect containers, chopped vegetables lose texture after 48 hours due to ethylene gas production and moisture loss. Store them with a paper towel at the bottom to absorb excess moisture, and keep them in the crisper drawer. Heartier options like bell peppers and carrots last 4-5 days; delicate herbs and leafy greens should be used within 2 days. time-saving kitchen gadgets.
The container system you choose should match your cooking frequency and commute. A single-person household prepping twice a week needs fewer containers than a family of four prepping once. Advanced technology, vacuum sealing and blast chilling, pays for itself in reduced food waste, which the USDA estimates costs the average household of four between $1,200 and $1,500 annually.
Low Sodium Meal Prep Ideas That Skip the Bland
Low sodium meal prep ideas don't have to mean bland, boring food. The trick is to build flavor with spices, acids, and aromatics instead of reaching for the salt shaker, which is where a quality seasoning blend becomes your best friend.
A low sodium meal prep strategy focuses on layering flavors. Start with a base of sautéed onions and garlic, add your protein, and finish with a strong spice blend. For example, a Taco Seasoning Mix 2 oz. brings an explosion of flavors to ground turkey or chicken without relying on salt, and the Tex-Mex approach works across proteins.

Batch Cooking Proteins and Whole Grains on Prep Day
Batch cooking is the engine of efficient meal prep. The goal is to cook large quantities of versatile proteins and whole grains that can be repurposed into different meals, such as roasting a large tray of chicken thighs, simmering a pot of ground beef with taco seasoning, and cooking a big batch of quinoa or brown rice.
Chicken, ground turkey, and lean beef are reliable protein choices. For whole grains, think beyond plain rice: quinoa, farro, and barley hold up well in the fridge and offer more texture and fiber. Season each protein differently for variety; one batch of taco meat can become taco salads, stuffed peppers, or a quick soup.
Food Safety Storage Guidelines for Weekly Prep
Food safety is the non-negotiable part of meal prep. The core principle is temperature control: cool cooked food quickly and keep it below 40°F to prevent the growth of bacteria that cause foodborne illness.
The USDA food safety guidelines recommend refrigerating cooked food within two hours of cooking (the CDC). For faster cooling, spread food in shallow containers rather than leaving it in a deep pot. Most prepped meals maintain quality for three to four days in the refrigerator. For longer storage, use your freezer; soups, stews, and cooked grains freeze exceptionally well for several months in airtight, freezer-safe containers.
Your First Meal Prep Session: A Step-by-Step Plan
Ready to start? Here is a simple plan for your first session, designed to take about one hour.
- Pick one recipe you already love. Don't experiment on prep day. Choose a recipe with simple ingredients and clear instructions.
- Triple the recipe. This is your batch cooking foundation.
- Shop with a list. Buy everything you need in one trip.
- Cook your protein and grain simultaneously. While the grain simmers, cook the protein.
- Chop vegetables for the first two days only. This preserves their texture and prevents them from becoming soggy.
- Portion everything into containers. Divide the protein, grain, and vegetables evenly.
- Label and refrigerate. Mark each container with the dish name and date.
| Prep Step | Time | Frequency |
|---|---|---|
| Plan menu and write grocery list | 15 minutes | Weekly |
| Shop for ingredients | 30 minutes | Weekly |
| Batch cook proteins and grains | 45 minutes | Weekly |
| Chop vegetables and portion meals | 30 minutes | Every 2-3 days |
| Reheat and assemble meals | 5 minutes | Daily |
This plan is the foundation of healthy eating habits that stick. Consistency matters more than perfection. If you miss a week, don't abandon the system. Start again the next Sunday with a simpler menu.
The Real Reason Meal Prep Fails: Burnout, Not Skill
Most guides stop at the mechanics, but the #1 reason people abandon meal prep is psychological burnout. A common pattern is the "all-or-nothing" trap: you prep 15 meals on Sunday, eat them for three days, then order takeout on Wednesday because you're tired of the same thing. The guilt from breaking the routine then kills the habit entirely.
Behavioral psychology research on habit formation (the "habit loop" of cue-routine-reward) suggests that meal prep must be designed for maintenance, not just initiation. Here are three evidence-based strategies to prevent burnout:
1. The 80/20 Rule for Variety
Do not prep 100% of your meals. Prep 80% (breakfasts, lunches, and 4 of 7 dinners) and leave 20% flexible. This gives you permission to eat out or order in without breaking the system. The psychological relief of an "escape hatch" increases adherence over time; a rigid 7-day plan collapses by day 4, while a flexible plan with built-in slack survives the month.
2. The "Two-Week Rotation" to Fight Flavor Fatigue
Flavor fatigue, not hunger, is what drives mid-week takeout orders. The 3-3-3 Rule helps, but even that gets boring by week three. Instead, build a two-week rotation: Week A uses taco-seasoned ground beef, roasted chicken, and quinoa; Week B uses lemon-herb chicken, black beans, and farro. The key is that Week B recipes are completely different from Week A, so you never eat the same meal twice in a 14-day period. This requires planning two menus at once, but it doubles perceived variety without doubling prep time.
3. The "Minimum Viable Prep" Day
When motivation is low, do not skip the week entirely. Instead, commit to a 15-minute "minimum viable prep" session: wash and chop one vegetable, cook one batch of grains, and hard-boil six eggs. This is based on the "implementation intention" concept, if you pre-decide that a low-effort prep day is still a success, you maintain the habit loop without the guilt of full failure. The following week, you'll naturally return to a full session.
The 10-Minute Rule for Reheating
The reheating step is where many people lose the plot. If a meal takes more than 10 minutes to reheat and assemble, you'll abandon it on a busy Tuesday. Use a microwave for grains and proteins (2-3 minutes), but consider an air fryer or toaster oven for roasted vegetables and crispy proteins (5-7 minutes). The texture difference is significant enough that most people find they actually look forward to the meal, which is the ultimate antidote to burnout.
Meal prep is a skill, and like any skill, it gets faster and easier with practice. The New Mexico Taco Soup Dry Mix is a perfect example of a 30-minute meal solution that fits this system: just add water and your choice of protein for a hearty, low sodium soup ready in half an hour. Starting with a few versatile, high-quality seasonings reduces the mental load of planning and keeps your meals from tasting repetitive.

For more inspiration on building flavor without salt, explore the Soup's Gone Wild Soup Collection 3 pack, which offers three gluten-free, no added MSG soup mixes ready in about 30 minutes. Each mix follows its own simple directions, making them excellent candidates for your batch cooking rotation.

Frequently Asked Questions
What is the 3-3-3 rule for meal prep?
The 3-3-3 rule is a simple framework to avoid burnout. It suggests focusing on three proteins, three grains or starches, and three vegetable sides. This structure keeps your prep session efficient without requiring an entire Sunday. You get variety across your meals without managing ten different recipes. It is a practical meal prep tip for anyone who wants weekly consistency without feeling overwhelmed by the process.
What are the best containers for long-lasting meal prep?
Glass containers with airtight, locking lids are a good choice for long-lasting meal prep. They do not absorb stains or odors like plastic, they are freezer-safe, and they transition straight from the fridge to the microwave or oven. For soups and stews, look for wide-mouth jars or containers with a secure seal to prevent leaks. Investing in a set of meal prep container essentials in 1-cup and 2-cup sizes covers most single portions and side dishes.
How do you keep meal-prepped food from getting soggy?
Sogginess happens when moisture sits against your food. Store wet ingredients separately and combine them right before eating. Keep dressings and sauces in small containers, and place raw vegetables away from cooked grains. For salads, put heartier items like cucumbers at the bottom and delicate greens on top. When reheating rice or grains, add a teaspoon of water before microwaving to restore steam. These low sodium meal prep ideas rely on fresh textures, so separating components protects the quality.
What are some low sodium meal prep ideas that still have flavor?
Skip the salt shaker and build flavor with acid, heat, and spice. Use citrus juice, vinegar, garlic, and onion as your base. A high-quality, no-MSG seasoning blend like Twisted Pepper Co.'s Tex-Mex Seasoning Mix adds a smoky kick without the sodium. Try a batch of their New Mexico Taco Soup Mix for a hearty, low sodium lunch that is ready in about 30 minutes. Cooking whole grains in low sodium broth instead of water also adds a savory depth to your weekly prep.
How long does meal-prepped food last in the refrigerator?
Most cooked meals stay fresh for 3 to 4 days in the refrigerator when stored properly. The USDA recommends refrigerating food within 2 hours of cooking and keeping your fridge at or below 40°F. Foods with high moisture, like soups and stews, may last slightly longer, while cooked fish is often best eaten within 2 days. If you are prepping for a full week, freeze portions you will not eat by day 3 or 4 to maintain quality and prevent food waste.
What is the fastest way to meal prep for the week?
A fast approach is to pick one protein, one grain, and two vegetables, then cook them in bulk using different methods. Roast a large tray of chicken thighs and vegetables in the oven while your rice cooker handles the whole grains. Portion everything into containers as soon as it is cool enough to handle. This method cuts decision fatigue and cleanup time. Using a versatile seasoning mix means you do not have to measure ten different spices for each dish.
Building a consistent meal prep habit comes down to having a plan and the right tools. Twisted Pepper Co. makes that easier with handcrafted, gluten-free seasoning mixes and soup blends that are low and light sodium, so you control the flavor without the salt. Our signature recipes turn simple proteins and grains into meals you look forward to eating all week. Get started with Twisted Pepper Co. and make your next prep day the easiest one yet.
This article was written using GrandRanker