

How to Properly Apply Dry Rubs to Chicken
Last Updated: October 22, 2026
Quick Summary
How to properly apply dry rubs to chicken starts with patting the meat completely dry, applying a thin binder like oil or mustard, then pressing the rub gently onto the surface using about one tablespoon per pound of chicken. Let the rub rest for at least 20 minutes at room temperature, or refrigerate for two to eight hours for deeper flavor penetration.
- Pat chicken completely dry with paper towels before applying any seasoning, as moisture prevents rub adhesion.
- Use approximately one tablespoon of dry rub per pound of chicken to avoid overseasoning.
- Apply a thin layer of oil, mustard, or honey as a binder to help the rub stick to the chicken.
- For skin-on chicken, work rub under the skin as well as on top, splitting the rub roughly 50/50 between layers.
- Refrigerate rubbed chicken for two to eight hours, or overnight, for maximum flavor development before cooking.
Table of Contents
- Why Proper Application Matters for Chicken Dry Rubs
- Preparing Your Chicken Before Seasoning
- How Much Dry Rub Per Pound of Chicken
- How to Get Dry Rub to Stick to Chicken
- Applying Dry Rub Chicken Under the Skin
- How Long to Leave Dry Rub on Chicken
- Common Mistakes and How to Fix Them
- Frequently Asked Questions
Why Proper Application Matters for Chicken Dry Rubs
Getting a dry rub to stick and deliver flavor takes more than sprinkling seasoning on chicken. When you apply rub properly, the seasonings penetrate the meat and create a flavorful crust during cooking.
Most home cooks make the same mistake: they skip preparation. Wet chicken won't hold seasoning because moisture creates a barrier that prevents the rub from adhering. A few minutes of prep work makes all the difference between seasoning that sticks and seasoning that falls off during cooking.
Preparing Your Chicken Before Seasoning
Patting Chicken Dry with Paper Towels
Start with dry chicken. This is non-negotiable. Grab paper towels and pat both sides thoroughly, pressing firmly on the skin and flesh until no visible moisture remains.
Wet surfaces repel dry seasonings, creating a slick layer that prevents the rub from sticking.
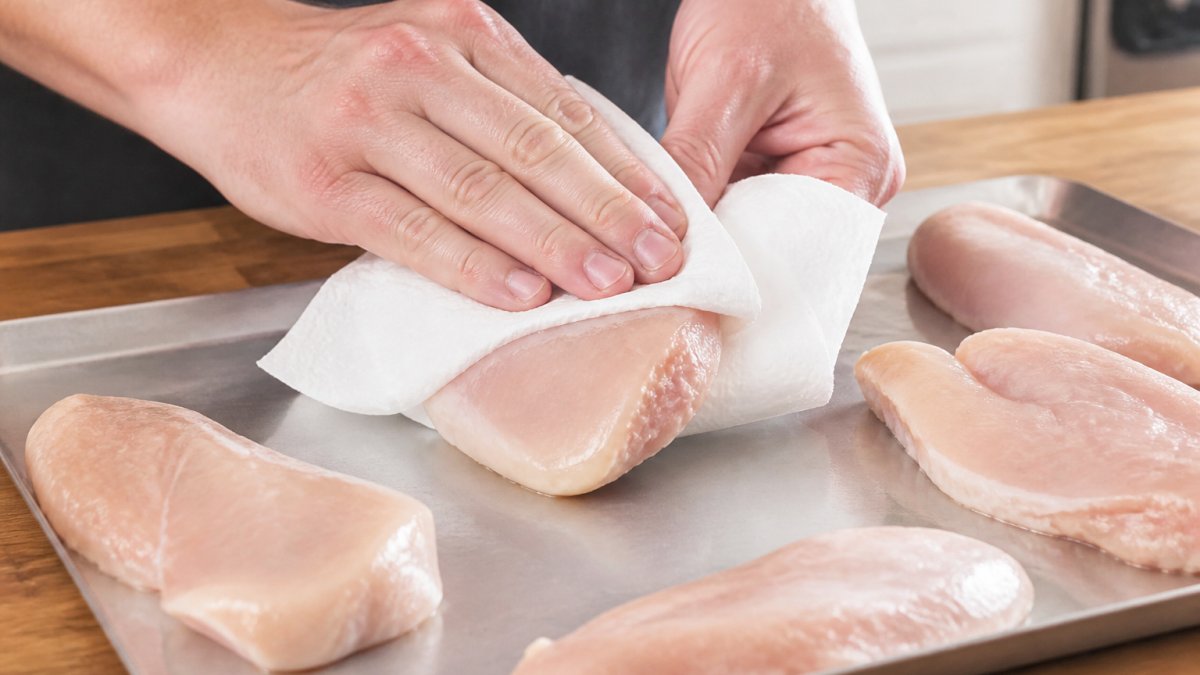
Here's the process:
- Lay chicken on a clean cutting board
- Grab several paper towels
- Pat the skin side firmly until dry
- Flip and pat the underside
- Repeat with fresh towels if needed
- Make sure no wet spots remain
Don't rush this step. It takes two minutes and changes everything.
Skin-On vs. Skinless Application
Skin-on and skinless chicken need different approaches. Skin holds seasoning naturally because it's textured and slightly oily. Skinless chicken is smoother and drier, making it harder for rub to stick.
For skin-on chicken, apply rub generously to both the outside and under the skin. Lift the skin carefully and work seasoning underneath.
For skinless chicken, use a binder. Oil or a wet ingredient helps the dry rub stick to smooth flesh. Skinless chicken needs that extra help to hold seasoning.
How Much Dry Rub Per Pound of Chicken
Too little rub and you get bland chicken; too much and the flavor becomes overwhelming. The right amount is about one tablespoon of dry rub per pound of chicken.
For a whole three-pound chicken, use roughly three tablespoons of rub total. For chicken breasts or thighs, use about one teaspoon per breast or thigh. Adjust slightly based on your taste preference and the intensity of your specific rub blend.
Here's a quick reference:
| Chicken Cut | Weight | Rub Amount |
|---|---|---|
| Whole chicken | 3-4 lbs | 3-4 tablespoons |
| Chicken breast | 6-8 oz | 1 teaspoon |
| Chicken thigh | 4-6 oz | ¾ teaspoon |
| Chicken wings | 2 oz each | ¼ teaspoon |
| Chicken drumstick | 3-4 oz | ½ teaspoon |
These are starting points. If your rub is particularly salty or spicy, use slightly less; if it's mild, add more. The goal is flavorful chicken, not overseasoned chicken.
Twisted Pepper Co.'s Chicken Rub is designed to deliver big flavor without being overwhelming. One tablespoon covers a pound of chicken beautifully.

How to Get Dry Rub to Stick to Chicken
Getting rub to adhere is the core challenge. Dry rub on dry chicken is the foundation, but the rub needs something to grip or seasoning slides off during handling and cooking.
Using Oil or a Binder for Better Adhesion
Oil is your best friend here. A light coating of oil acts as glue for your dry rub.
Other binders work too.
Apply your binder sparingly, just enough to make the surface slightly sticky. Too much creates a paste instead of a rub. Thin layers work best.
Here's the order:
- Pat chicken dry with paper towels
- Apply thin binder layer (oil, mustard, or honey)
- Press dry rub onto the binder
- Let it rest before cooking
This sequence ensures maximum adhesion. The binder gives the rub something to grip. The dry rub then creates the flavorful crust during cooking.
Pressing Gently So Seasoning Adheres
How you apply the rub matters as much as what you're applying. Use your fingers or the back of a spoon to press the seasoning gently onto the chicken.
Press down with steady, gentle pressure and work systematically across the entire surface. Uneven application leads to some bites tasting strongly seasoned and others bland.
Pay special attention to crevices and folds, where seasoning collects and intensifies flavor, those spots deliver flavor bursts during eating.
Applying Dry Rub Chicken Under the Skin
Under-skin seasoning is the single biggest upgrade most home cooks can make, but it only works if you respect the skin's dual role: it is both a flavor barrier and your best chance at crispy, golden-brown poultry. Get the technique right and you get seasoned meat and crackling skin. Get it wrong and you get soggy skin or torn pockets that leak seasoning.
Skin-On: The Pocket Technique
Start with skin-on chicken patted completely dry, inside and out. Loosen the skin by working your fingers gently between the two layers, starting at the cavity end of a whole bird or the wide end of a thigh.
Create a pocket running the length of the breast or thigh, leaving the skin attached at the edges so the rub stays contained.
Pull the skin back into place and apply the remaining rub to the outside. The skin should look dry and matte, not wet or greasy.
Skinless: Where the Rub Goes Instead
Skinless chicken has no pocket, so the rub goes directly on the flesh, smooth and wet, which is why a binder matters more here than anywhere else. Pat the surface dry, brush on a very thin layer of oil or mustard, then press the rub on. With no skin to protect the seasoning, use a low-sugar rub; sugar on bare flesh scorches quickly under high heat, while a salt-forward blend browns more evenly.
Keeping the Skin Dry Enough to Crisp
Moisture from the meat and rub can steam the skin from below. Three practices keep it crisp:
- Dry the skin aggressively before rubbing. The surface should feel like paper, not damp fabric.
- Keep the outside rub light. A heavy top coat traps moisture and turns pasty. A thin, even layer browns better.
- Rest uncovered in the refrigerator. Leaving the bird uncovered for a few hours (or overnight) dries the skin surface, the same principle behind dry-brining. Cover only loosely if your refrigerator tends to circulate strong odors.
For a whole bird, consider a brief high-heat blast (around 425°F) for the first 15-20 minutes to render and crisp the skin, then lower the heat to finish cooking through. This helps offset the moisture the under-skin rub introduces.
Cut-by-Cut Guidance
- Whole chicken: Pocket the breasts and thighs; apply half the rub under the skin, half on top. Overnight uncovered rest is ideal.
- Bone-in thighs: One pocket per thigh, rub worked along the bone side of the flesh. The skin protects the seasoning during longer cooks.
- Drumsticks: Skin is tight and hard to pocket; apply most of the rub on the surface and work a little into the ends where the skin loosens.
- Wings: Skin is thin and tears easily. Skip the pocket and apply a light surface rub only; sugar-heavy rubs burn fast on wings.
- Breasts (skin-on): Pocket from the thick end, season the flesh, and keep the top rub light so the skin crisps.
How Long to Leave Dry Rub on Chicken
The rub needs time to penetrate the meat and develop flavor. But how much time?
Refrigeration and Resting Time
The minimum is 20 minutes at room temperature, which lets the rub set and begin flavoring the surface.
Cold temperatures slow evaporation and help seasonings penetrate deeper. Overnight rubs deliver noticeably more complex flavor than quick applications.
Here's what happens over time:
- 20 minutes: Surface flavoring begins
- 2 hours: Flavor starts penetrating the meat
- 8 hours: Deep flavor development
- 12+ hours: Maximum flavor intensity
Don't worry about leaving rub on too long, even 24 hours won't oversalt or overseason the chicken.
After refrigerating, let the chicken sit at room temperature for 15 minutes before cooking so it cooks evenly.
Timing by Cooking Method
Cooking method affects how long the rub should sit beforehand.
For grilling, apply rub at least two hours before cooking. High heat caramelizes the seasonings into a crust, and pre-application time helps flavors set before that happens.
For smoking, overnight application is ideal. Smoke penetrates slowly, so the rub needs time to establish flavor first, creating layers of seasoning and smoke.
For baking or roasting, even 20 minutes helps, but two to four hours is better. The gentler heat means more time is needed for seasonings to develop.
For pan-searing, apply rub at least one hour before cooking. The quick, high-heat sear needs established flavor to shine through.
Common Mistakes and How to Fix Them
Most problems stem from skipping preparation or rushing the process.
Rub falling off during cooking. Your chicken wasn't dry enough or you skipped the binder.
Uneven seasoning. Some bites taste strongly seasoned while others taste bland.
Overseasoned chicken. The rub tastes too salty or spicy. Solution: Use less rub next time.
Seasoning burning during cooking. The rub turns black or tastes burnt. Solution: Lower your cooking temperature slightly.
Getting how to properly apply dry rubs to chicken right transforms your cooking.
Twisted Pepper Co.'s Chicken Rub makes this process even easier. Apply it following the techniques above and you'll get perfectly seasoned chicken every time. Shop our Chicken Rub and discover why home cooks trust Twisted Pepper Co. for flavorful, easy meals.
Frequently Asked Questions
How much dry rub should I use per pound of chicken?
Use approximately 1 to 2 tablespoons of dry rub per pound of chicken, depending on how bold you want the flavor. For a whole 4-pound bird, that's about 4 to 8 tablespoons total. Start with 1 tablespoon per pound and adjust based on your taste preference. Twisted Pepper Co.'s Chicken Rub is designed to deliver robust flavor, so you can apply it generously without overpowering the meat.
Can I apply dry rub to chicken right before cooking?
While you can apply rub immediately before cooking, allowing it to rest improves flavor absorption. Twisted Pepper Co. recommends refrigerating seasoned chicken for at least 20 minutes, though longer is better. Overnight resting (8-12 hours) develops deeper flavor as the spices penetrate the meat. If you're short on time, 20 to 30 minutes in the refrigerator still makes a noticeable difference.
What's the best way to get dry rub to stick to chicken?
Pat the chicken completely dry with paper towels first, then lightly coat the surface with oil before applying the rub. The moisture acts as a binder, helping spices adhere. Press the seasoning gently onto the meat using your fingertips, working it into any crevices. For skin-on chicken, work some rub directly under the skin for maximum flavor and adhesion.
Should I apply dry rub under the chicken skin?
Yes, applying rub under the skin delivers more intense flavor and helps it stay in place during cooking. Carefully loosen the skin by sliding your fingers between the skin and meat, then rub seasoning directly onto the flesh. This technique works especially well for whole chickens and bone-in breasts. Combine this with rub on the outside for comprehensive seasoning that won't wash away.