

How to Make Chicken Taste Better Without Marinating
Table of Contents
- Why You Do Not Need to Marinate Chicken
- Best Dry Rubs for Chicken That Deliver Big Flavor
- How to Season Chicken for the Grill
- Tips for Juicy Chicken Breast Every Time
- Searing, Patting Dry, and the Maillard Reaction
- Chemical-Free Tenderizing and Post-Cooking Flavor Infusion
- Frequently Asked Questions
Last Updated: September 16, 2026
Why You Do Not Need to Marinate Chicken
Marinating is the most overrated step in home cooking. A marinade only penetrates the outer few millimeters of meat, so the flavor you taste is mostly surface-level, and the acid in many marinades actually breaks down muscle fibers until the texture turns mushy. You can make chicken taste better without marinating at all, and you will often get a better result in less time.
Best Dry Rubs for Chicken That Deliver Big Flavor
A dry rub outperforms a liquid marinade because it stays on the surface, where your taste buds actually are. The best dry rubs for chicken balance salt, sugar, and aromatics so the seasoning caramelizes under heat instead of steaming off.
Here is what a reliable rub needs:
- Salt for seasoning and moisture retention
- A little sugar to help browning
- Aromatics like garlic powder, onion powder, and smoked paprika
- A warm spice such as cumin or chile powder for depth
How to Season Chicken for the Grill
Seasoning chicken for the grill comes down to three moves: dry the surface, apply fat, then apply seasoning. Skip any one of them and you lose flavor.
For grilled chicken specifically:
- Pat the chicken dry and let it sit for 10 minutes
- Coat lightly with olive oil
- Apply your dry rub and press it into the surface
- Let the seasoned chicken rest 15 to 30 minutes before grilling
- Grill over medium-high heat, turning once
Tips for Juicy Chicken Breast Every Time
Juicy chicken breast is a function of temperature control, not luck. The single biggest mistake home cooks make is cooking to a time instead of a temperature. Chicken breast is lean and dries out fast once it passes its target internal temperature.
Other tips that keep chicken breast juicy:
- Brine briefly with a saltwater soak for 15 to 30 minutes, which is not the same as marinating
- Use a meat thermometer every time
- Rest the meat for 5 to 10 minutes after cooking so juices redistribute
- Avoid overcooking by pulling it right at temperature
Searing, Patting Dry, and the Maillard Reaction
The Maillard reaction is the set of chemical reactions between amino acids and reducing sugars that produces the brown crust and savory flavor on cooked meat. It is named for French chemist Louis-Camille Maillard, who described it in the early 1900s. It is not the same thing as caramelization, which involves only sugars. The Maillard reaction needs both a protein source and a sugar, plus heat and a dry surface.
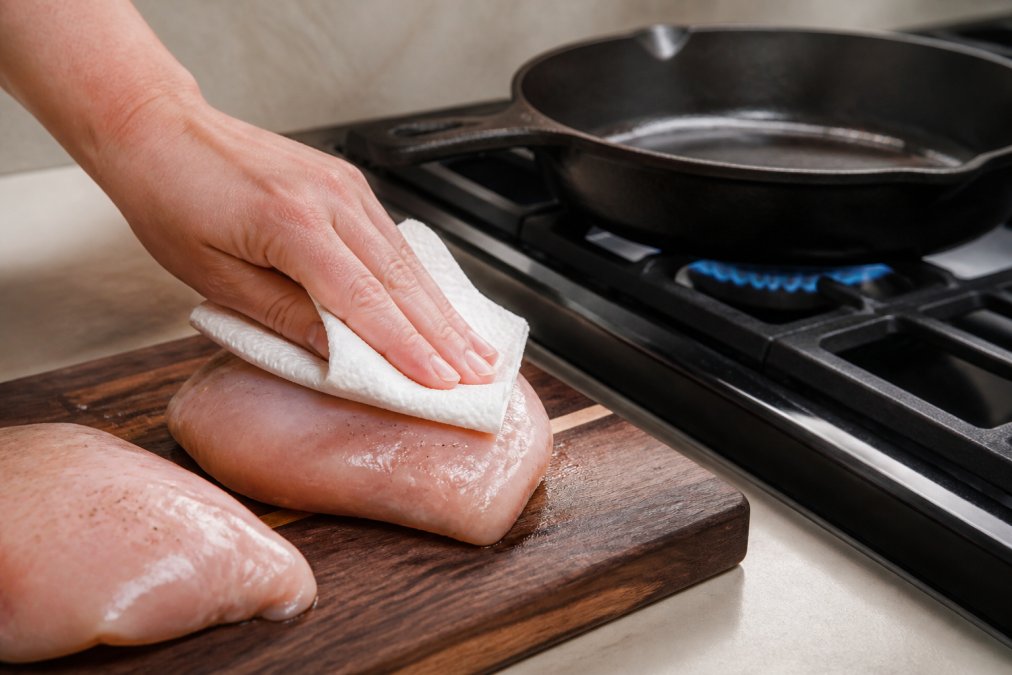
Why a Dry Surface Is Non-Negotiable
Water is the enemy of browning for a simple physical reason: as long as moisture sits on the surface of the chicken, the energy from the pan goes into evaporating that water rather than raising the surface temperature. Water boils at 212°F, and the Maillard reaction does not really get going until the surface climbs well above that, most cooks aim for a pan temperature in the 350°F to 450°F range for a hard sear.
The Sear, Step by Step
- Dry the surface completely. Paper towels, firm pressure, no shortcuts.
- Preheat the pan properly. A cast iron or heavy stainless skillet over medium-high heat for 3 to 5 minutes. Test with a drop of water, it should sizzle and evaporate on contact, not bead up and roll around.
- Add a high-smoke-point fat. Olive oil, avocado oil, or a neutral oil like canola. Butter alone burns at searing temperatures; if you want butter flavor, add it at the end and spoon it over.
- Lay the chicken down away from you to avoid splatter, and do not move it. Leave it alone for 4 to 6 minutes for a breast, longer for a thigh.
- Flip once. The crust should release from the pan on its own when it is ready. If it sticks, it is not done browning.
- Do not crowd the pan. Pieces that touch release moisture into the shared space, and the pan turns into a steamer.
Crowding the pan is the fastest way to ruin a sear. When pieces touch, they release moisture that turns the pan into a steamer, and you end up with pale, gray chicken instead of a golden crust. Sear in batches if you have to.
Pan-Sear vs. Grill vs. Broiler
The Maillard reaction does not care which heat source you use, only that the surface is dry and hot. A ripping-hot grill grate, a screaming cast iron pan, and a broiler set to high all get you there. The trade-offs are practical:
- Pan-sear gives you the most control and lets you build a pan sauce from the fond, the browned bits stuck to the bottom.
- Grill adds smoke compounds that layer on top of Maillard flavor, but flare-ups from dripping fat can char the surface before the interior cooks.
- Broiler is the fastest route for thin cuts like cutlets, but it is easy to overshoot because the heat comes from above and you cannot see the underside.
Chemical-Free Tenderizing and Post-Cooking Flavor Infusion
Most guides stop at salt when they talk about tenderizing, and almost none of them cover what you can do after the chicken comes off the heat. This section claims both gaps: enzymatic tenderizers that work without a long soak, and finishing techniques that build flavor on the plate.
Enzymatic Tenderizers That Work in Minutes, Not Hours
Enzymes are proteins that break down other proteins. Certain foods contain enzymes that attack the connective tissue and muscle fibers in chicken, and they work far faster than a salt brine. The catch is that they also work on the surface, so timing matters, leave them on too long and the texture turns mushy.
- Plain yogurt contains lactic acid bacteria and calcium, which gently denature surface proteins. A 30-minute coat is enough for a noticeable difference. Greek yogurt is thicker and clings better.
- Fresh pineapple contains bromelain, a protease that breaks down collagen. Use fresh, not canned, canning heat deactivates the enzyme. 15 to 30 minutes max.
- Papaya contains papain, another protease. Green papaya is more potent than ripe. Same 15-to-30-minute window.
- Ginger contains zingibain, which is especially effective on tougher cuts like thighs and legs. Grate it fresh and rub it on.
- Kiwi contains actinidin and is one of the fastest-acting options, 10 to 15 minutes is plenty, and longer will turn the surface to paste.
Physical Tenderizing Without Additives
If you would rather skip the fruit and dairy entirely, physical methods still work:
- Pounding a breast to an even ¾-inch thickness with a mallet or the bottom of a heavy pan. Even thickness means even cooking, and even cooking means no dry, tough patches.
- Scoring the surface lightly with a knife in a crosshatch pattern. This opens the surface so seasoning and heat reach more of the meat.
- Salting early, a dry salt sprinkle 30 to 45 minutes ahead draws moisture out and then reabsorbs it with dissolved salt, which seasons the meat and helps it hold water.
- Cooking to temperature so the meat never toughens from overcooking in the first place. This is the most underrated tenderizing technique there is.
Post-Cooking Flavor Infusion: The Step Most Guides Skip
Once chicken is cooked, the surface is still open to flavor. This is where restaurant kitchens pull ahead of home cooks, and it takes seconds.
- Compound butter. Mash softened butter with minced garlic, chopped herbs (parsley, thyme, tarragon), lemon zest, and a pinch of salt. Roll it in plastic wrap, chill, and slice off a coin to melt over a hot breast or thigh. The butter carries fat-soluble flavor compounds that coat the meat as it melts.
- Pan sauce. After searing, pour off excess fat, add a splash of stock or wine to the hot pan, and scrape up the fond with a wooden spoon. Reduce by half, then swirl in a knob of cold butter off the heat. Spoon it over the sliced chicken.
- Finishing oil. A drizzle of good olive oil mixed with Savory Italian Seasoning or a squeeze of lemon right before serving adds a bright, fresh top note that cooking heat would have destroyed.
- Acid at the end. A squeeze of lemon, lime, or a splash of vinegar wakes up the whole dish. Acid does not tenderize at this stage, but it cuts through richness and makes the seasoning read louder.
- Fresh herbs. Soft herbs like cilantro, basil, and dill lose their aroma when cooked. Add them after the chicken is off the heat.
| Technique | When to Apply | What It Does |
|---|---|---|
| Dry rub | Before cooking | Builds surface crust and flavor |
| Enzymatic tenderizer (yogurt, pineapple, papaya) | 15-30 min before | Breaks down surface proteins |
| Short brine | 15-30 min before | Keeps meat juicy |
| Patting dry | Right before sear | Enables browning |
| Compound butter | After cooking | Adds richness and aroma |
| Pan sauce | After searing | Captures fond as flavor |
| Finishing oil | At plating | Brightens the final flavor |
| Acid (lemon, vinegar) | At plating | Cuts richness, lifts seasoning |
Frequently Asked Questions
Can you skip marinating chicken and still get great flavor?
Yes. A dry rub applied 30 minutes before cooking seasons the surface and locks in flavor without liquid. Patting the chicken dry first helps the rub stick and promotes browning. For a 1-pound chicken breast, use about 1 tablespoon of rub. Twisted Pepper Co.'s Tex-Mex Seasoning Mix works as a dry rub on chicken, steak, pork, or fish and needs only 30 minutes to infuse flavor.

What are the best dry rubs for chicken?
Look for blends with smoked paprika, garlic powder, cumin, and a moderate salt level. A good rub balances heat, sweetness, and aromatics. Twisted Pepper Co.'s Tex-Mex Seasoning Mix combines chile powders, cumin, garlic, and smoked kosher salt for a tangy, savory crust. Tuscan Roasted Garlic Seasoning adds Italian spice depth. Both are gluten-free and contain no MSG.
How do you keep chicken breast tender without marinating?
Brine the chicken in a saltwater solution for 30 minutes, or salt it dry and let it rest for 20 to 30 minutes before cooking. Cook to an internal temperature of 165°F and let the meat rest for 5 minutes. Slicing against the grain also shortens the protein fibers and makes each bite more tender.
Is it okay to cook chicken without marinating?
Absolutely. Marinating is one path to flavor, not the only one. Dry rubs, brining, compound butter, and finishing sauces all add taste without soaking the meat. A simple sprinkle of Twisted Pepper Co.'s Fajita Seasoning on sliced chicken before a quick sauté delivers bold Tex-Mex flavor in under 30 minutes.