

Gluten-Free No MSG Lunch Meal Prep: A Step-by-Step Guide
Table of Contents
- Why Gluten-Free No MSG Lunch Prep Matters
- Essential Gluten-Free Pantry Staples for Lunch Prep
- MSG-Free Seasoning Substitutes That Add Real Flavor
- Gluten-Free Meal Prep Containers and Storage Setup
- Easy Gluten-Free Lunch Recipes Ready in 30 Minutes
- Batch Cooking Strategies and Prep Schedule
- Food Safety and Cross-Contamination Prevention
- Conclusion
- Frequently Asked Questions
Last Updated: September 18, 2026
Why Gluten-Free No MSG Lunch Prep Matters
Preparing a gluten-free no MSG lunch saves hours during the week and keeps your energy steady. Batch cook on Sunday and you'll have balanced, ready-to-eat containers all week.
Essential Gluten-Free Pantry Staples for Lunch Prep
Proteins that hold up well:
- Rotisserie chicken (buy pre-cooked, saves 20 minutes)
- Ground turkey or beef (cook and portion)
- Canned tuna or salmon (no cooking required)
- Hard-boiled eggs (batch cook a dozen)
- Deli turkey or roast beef (check for gluten on the label)
Grains and starches that are naturally gluten-free:
- Rice, quinoa, sweet potatoes, certified gluten-free oats, corn tortillas
Vegetables that don't get soggy:
- Broccoli, bell peppers, carrots, green beans, cherry tomatoes, cucumber (add day-of)
Pantry staples:
- Olive oil, vinegar, salt, pepper, certified gluten-free broth, nuts and seeds
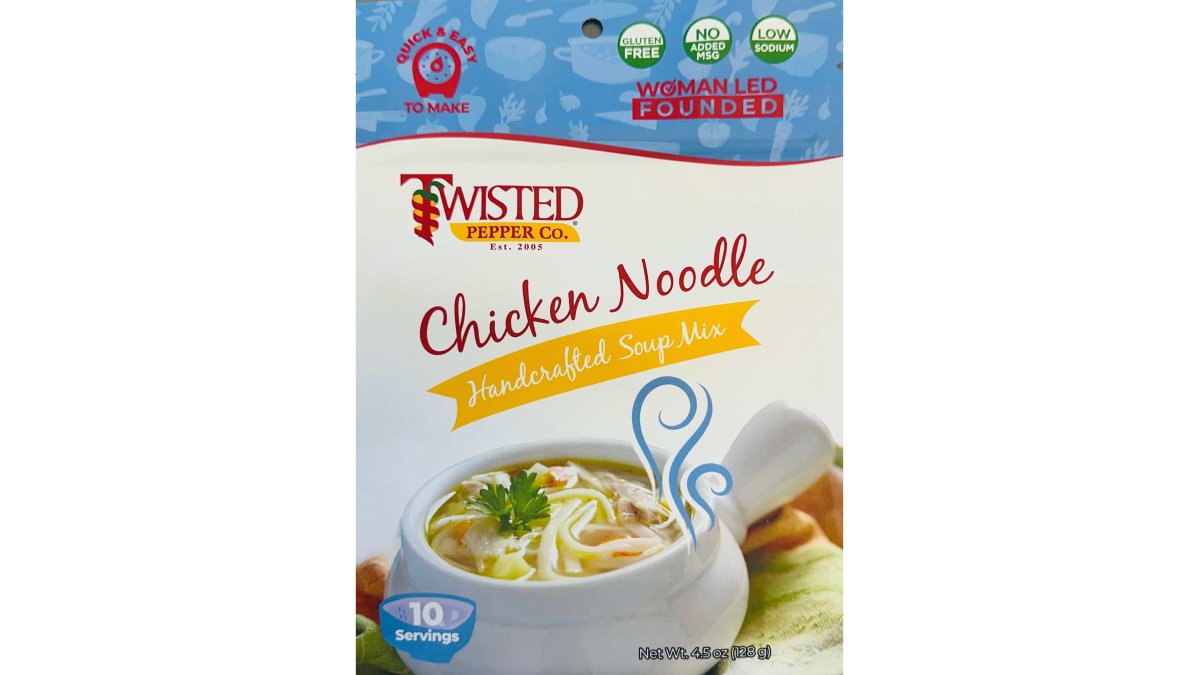
The Chicken Noodle Dry Soup Mix from Twisted Pepper Co. is a shortcut worth keeping on hand. It's gluten-free, MSG-free, and serves 10 in 30 minutes or less. Just add water, noodles, and precooked chicken, no complicated steps.

MSG-Free Seasoning Substitutes That Add Real Flavor
MSG hides in commercial seasonings under names like "natural flavors," "yeast extract," or "hydrolyzed vegetable protein." You need to know what to look for on labels.
Hidden Names for MSG: The Complete Label-Reading Guide
MSG appears under 40+ names on labels. Here's what to watch for:
Direct MSG names (always avoid):
- Monosodium glutamate
- MSG
- Glutamic acid or glutamate
Ingredients that are always or almost always MSG:
- Yeast extract
- Autolyzed yeast extract
- Hydrolyzed vegetable protein (HVP)
- Hydrolyzed plant protein (HPP)
- Hydrolyzed soy protein
- Sodium caseinate
- Calcium caseinate
- Textured vegetable protein (TVP)
Ingredients that often contain MSG (30-60% glutamate by weight):
- Natural flavors (the biggest culprit, vague enough to hide MSG)
- Beef flavoring, chicken flavoring, seafood flavoring
- Soy sauce (unless labeled MSG-free)
- Fish sauce (unless labeled MSG-free)
- Worcestershire sauce (check the label; many contain hydrolyzed protein)
- Malt extract or malt flavoring
- Barley malt
- Tomato paste (when used as a "flavoring" rather than a primary ingredient)
- Whey protein concentrate
- Bouillon or broth (commercial versions almost always contain hydrolyzed protein)
Ingredients that may contain MSG (variable):
- Spice blends (especially "seasoning mixes")
- Flavoring (unspecified)
- Smoke flavoring
- Caramel color (some formulations)
How to Read a Seasoning Label in 30 Seconds
Step 1: Check the ingredient list, not the front label. "No MSG added" doesn't mean MSG-free, other ingredients may contain it.
Umami-Rich Ingredients That Replace MSG (Without the Hidden Names)
Proteins and fermented foods that add savory depth:
- Parmesan cheese (aged varieties have natural glutamates)
- Tomato paste (use as primary ingredient, not "flavoring")
- Tamari, coconut aminos, or MSG-free liquid aminos
- Mushroom powder (dried porcini or shiitake)
- Fish sauce (only brands listing "fish" and "salt")
- Bone broth (homemade or bones/water/salt only)
Flavor-building spice blends you can make at home:
- Garlic powder + black pepper + smoked paprika
- Oregano + basil + thyme + black pepper
- Cumin + chili powder + garlic powder + salt
Make Your Own Seasoning Blends
Making your own blends takes 5 minutes and costs a fraction of commercial versions.
Basic formula:
- 2 tablespoons garlic powder
- 1 tablespoon black pepper
- 1 tablespoon paprika (smoked or regular)
- 1 tablespoon dried oregano or Italian herbs
- 1 teaspoon salt
Gluten-Free Meal Prep Containers and Storage Setup
Container choice depends on whether you have microwave access at work. You need airtight seals, no staining, and fresh food without condensation.
Container Types: Microwave vs. No-Heat Lunches
If you have microwave access:
Features that matter:
- Airtight seal
- Divided compartments
- Microwave-safe
- Freezer-safe
- Durable plastic or glass
Option 1: Insulated lunch containers with ice packs Insulated containers maintain cold temperatures for 6-8 hours with a frozen ice pack. Look for 20-30 oz capacity, airtight seals, and stainless steel or high-grade plastic ($30-$60, lasts years).
Compartment Strategy for Cold Lunches
Layout for no-heat lunches:
- Section 1: Protein (chicken, turkey, eggs, tuna)
- Section 2: Grains or starches (rice, quinoa, sweet potato)
- Section 3: Raw vegetables (carrots, bell peppers, cherry tomatoes, cucumber)
- Section 4: Dressing, nuts, or cheese, add just before eating
Pro tip for no-heat lunches: Assemble the night before, but keep the dressing in a separate small container. Add it 30 minutes before eating. This prevents vegetables from absorbing oil and becoming limp.
Temperature Safety for No-Heat Lunches
Food left at room temperature for more than 2 hours enters the danger zone (40°F-140°F). Pack in an insulated container with a frozen ice pack, keep in a cool place, and eat within 4 hours. For 8+ hours, use a gel ice pack that stays frozen. Maintaining these temperature controls becomes even more critical when managing dietary needs while traveling, as consistent food safety practices ensure your meals remain both nourishing and safe throughout the journey.
Safest proteins for no-heat lunches:
- Hard-boiled eggs, canned tuna or salmon, deli turkey, rotisserie chicken
Avoid for no-heat lunches:
- Ground meat (spoils faster, requires consistent cold)
- Homemade soups or broths (harder to keep at safe temperature)
- Anything with mayo-based dressing (can separate or spoil if not kept cold)
Storage in Your Fridge and Freezer
Store containers at eye level in your fridge. Refrigerate lunches for 3 days; freeze the rest immediately after assembly.
Freezing strategy:
- Label with date and contents
- Fridge: 4-5 days; Freezer: 2-3 months
- Thaw overnight in the fridge
Preventing Cross-Contamination in Storage
Storage best practices:
- Store prepped lunches on a separate shelf
- Use separate cutting boards, utensils, and prep area
- Label containers clearly
- Store in a sealed plastic bin if space is tight
Easy Gluten-Free Lunch Recipes Ready in 30 Minutes
Recipe 1: Rotisserie Chicken Buddha Bowl
- 1 cup cooked rice or quinoa
- 4 oz shredded rotisserie chicken
- 1 cup roasted broccoli and carrots
- Cherry tomatoes
- Olive oil and vinegar dressing
Holds 4 days. Reheat grains and protein together.
Recipe 2: Seasoned Ground Turkey with Roasted Vegetables
Cook 2 pounds ground turkey with Tuscan Roasted Garlic Seasoning. Divide into 5 containers with roasted sweet potato and green beans.

Recipe 3: Soup-Based Lunch (Fastest Option)
Recipe 4: Egg-Based Lunch (No Cooking Required)
Batch Cooking Strategies and Prep Schedule
Sunday prep schedule:
Sunday prep schedule:
- 9:00 a.m.: Start proteins (rotisserie chicken, 2 lbs ground turkey, 12 eggs)
- 9:15 a.m.: Cook rice or quinoa; chop vegetables
- 9:35 a.m.: Roast vegetables at 425°F for 30-40 minutes
- 10:15 a.m.: Cook Chicken Noodle Dry Soup Mix if using
- 10:30 a.m.: Assemble and label containers
Total: 2 hours active work, 1 hour hands-off
Prep every other Sunday. You'll have backup lunches from two prep batches.
Food Safety and Cross-Contamination Prevention
Gluten hides in places you don't expect. Cross-contamination in your own kitchen is more common than eating gluten by accident at a restaurant.
High-risk areas in your kitchen:
- Toaster (crumbs everywhere)
- Cutting boards (if shared with regular bread)
- Colanders (gluten particles can stick)
- Wooden spoons and utensils (absorb gluten)
- Butter and condiment jars (double-dipping spreads crumbs)
Prevention steps:
- Use separate cutting boards for gluten-free prep (color-code them if you live with others)
- Wash hands thoroughly before touching gluten-free food
- Use clean utensils, never share a spoon between regular and gluten-free containers
- Wipe down counters with a damp cloth before prepping
- Store gluten-free items on a separate shelf in the pantry and fridge
Check ingredient labels for hidden gluten. Common culprits:
- Soy sauce (contains wheat)
- Worcestershire sauce (check the label)
- Broth (some brands add wheat)
- Seasonings with "anti-caking agents"
- Anything labeled "may contain wheat"
Conclusion
A gluten-free no MSG lunch strategy helps you control the ingredients and avoid hidden MSG.
Frequently Asked Questions
How do you ensure seasonings are MSG-free when meal prepping gluten-free lunches?
Check ingredient labels for monosodium glutamate listed explicitly, and look for products labeled 'no added MSG' or 'MSG-free.' Natural ingredients like garlic powder, onion powder, and herbs contain glutamates but are not processed MSG. Twisted Pepper Co. seasonings use clean plant-based bouillon approved by the Celiac Disease Foundation, making them safe for both gluten-free and MSG-free meal prep. When in doubt, buy single-ingredient spices rather than blended mixes from unknown sources.
How long can you safely store meal-prepped gluten-free lunches in the refrigerator?
Most properly stored gluten-free meal-prepped lunches stay fresh for 3 to 4 days when kept at 40°F or below. Cooked proteins, vegetables, and grains maintain quality within this window. Store in airtight gluten-free meal prep containers on the coldest shelf of your refrigerator, away from raw foods. If you're prepping for the entire week, freeze portions after day 3 and thaw the night before eating. Always discard any lunch that develops an off smell or appearance.
What are some good no-heat gluten-free lunch ideas for busy schedules?
Build lunches around shelf-stable and cold components: canned tuna or rotisserie chicken, whole grains like quinoa or rice, raw or roasted vegetables, and gluten-free cheese. Assemble buddha bowls with leafy greens, shredded carrots, cucumber, cherry tomatoes, and a protein. Pack nuts, seeds, and fresh fruit separately to prevent sogginess. Use gluten-free dips like ranch or cheese mixes from Twisted Pepper Co. with vegetable sticks. These no-heat lunches require no microwave and travel well in insulated lunch bags.
What are the best containers for keeping gluten-free lunches fresh during the workday?
Use glass or BPA-free plastic gluten-free meal prep containers with airtight lids to prevent cross-contamination and maintain freshness. Compartmentalized containers keep wet and dry ingredients separate, preventing sogginess. Pair containers with an insulated lunch bag and a reusable ice pack to maintain safe temperatures for 4 to 6 hours. Label containers with prep dates so you track freshness. Glass containers are best for reheating and last longer, while lightweight plastic works for grab-and-go cold lunches.
Twisted Pepper Co. makes this process faster with handcrafted, gluten-free seasonings and soup mixes, no MSG, no guessing. The Chicken Noodle Dry Soup Mix serves 10 in 30 minutes or less, and the Tuscan Roasted Garlic Seasoning works on everything from roasted vegetables to grilled chicken. Shop Now and simplify your gluten-free lunch prep.